
1.2. First project with Eclipse
Last updated: 25 January 2013.
In this tutorial, you will create your first Eclipse project, compile and run it.
1.2.1. How to create a project
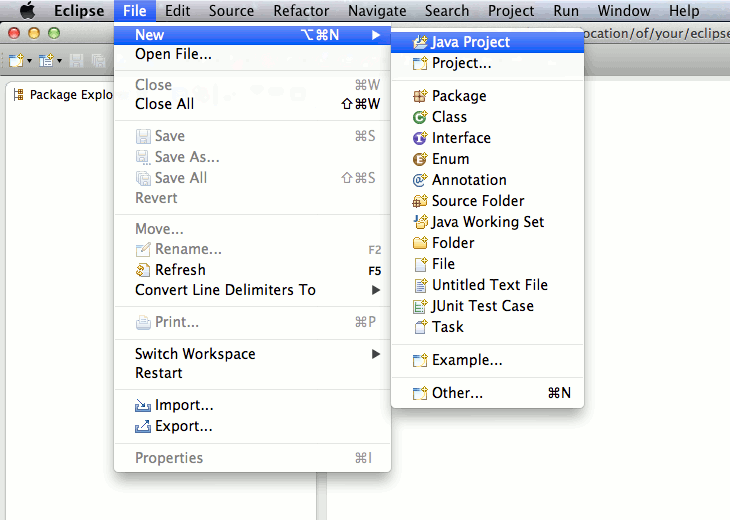
In the drop down menu, click File -> New -> Java Project as shown below:
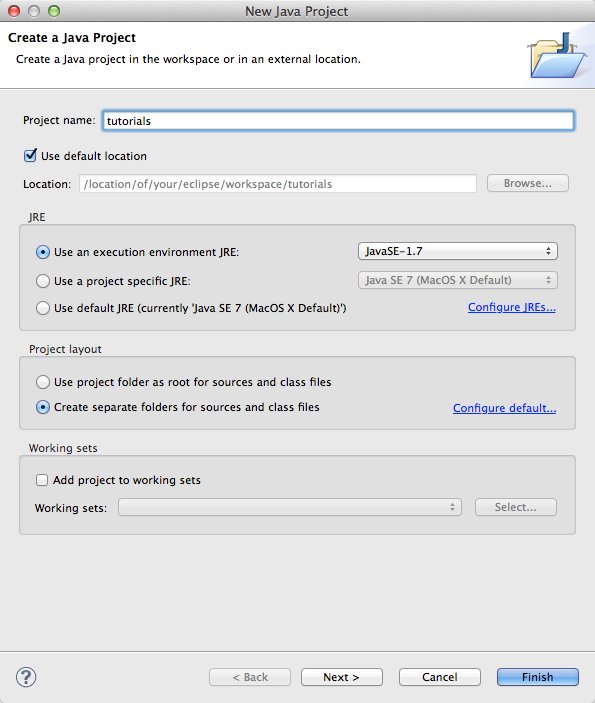
The dialog box shown below is displayed. Choose a name for your project (for example: tutorials). You can leave the other items at their default settings. That way, the project will be located in the default Eclipse workspace. As you can see in the project layout section, the source files (files with the extension .java) will be separated from the byte code files (files with the extension .class), which is highly recommended.
Click Next to display the following dialog box:

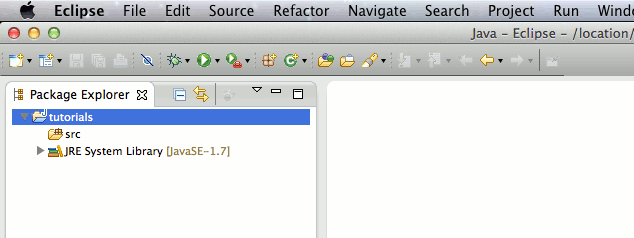
You can leave the settings at their default. When you click the button Finish, the project is created in a directory named tutorials in your workspace folder. The source files will be contained in a subdirectory named src and the class files in a subdirectory named bin. However, the bin subdirectory is not shown in the Eclipse package explorer. Only the src subdirectory is visible as shown below:
1.2.2. How to create packages and classes
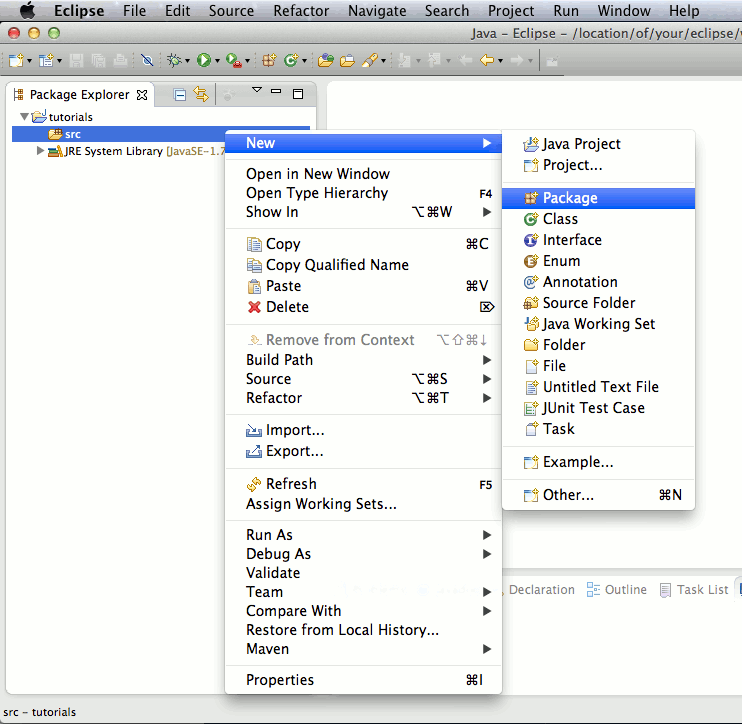
The src directory is the place where you create packages and classes. To create a package, right-click the src folder and click New -> Package as shown below:
Choose a base package name for your project. As I said in the tutorial Packages, a base package name should start with your company's internet domain name in reverse order. For example, for these tutorials, you can create a base package named com.javaperspective.tutorials as follows:
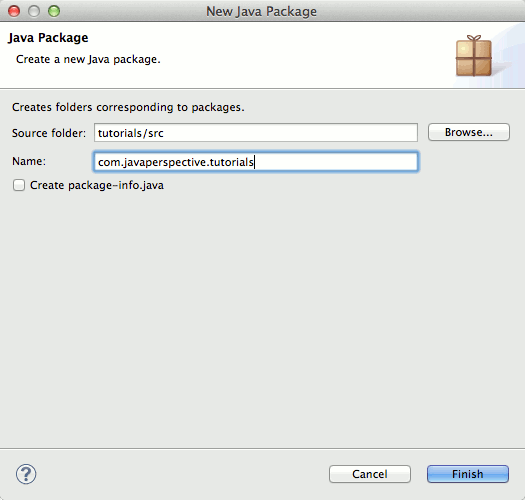
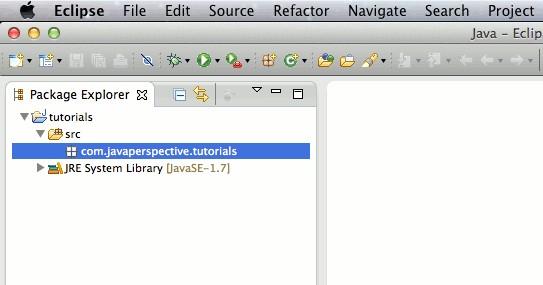
Click Finish when you have chosen a base package name. The picture shown below shows the newly created package:
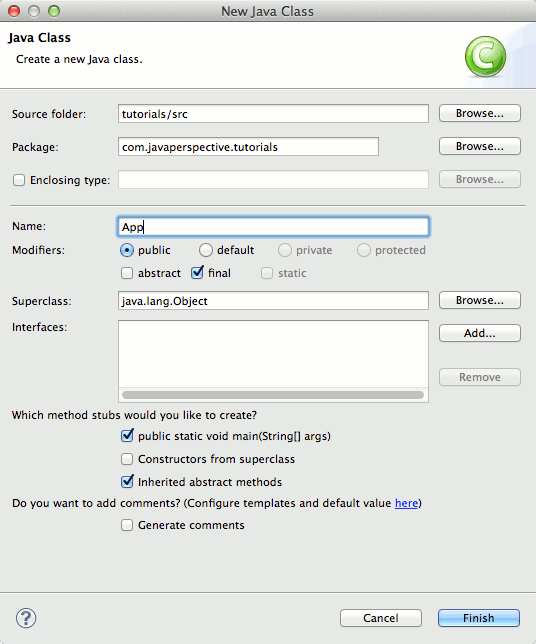
Now that you have a base package, you can create a class that will contain the main method of your application. Right-click the package com.javaperspective.tutorials and click New -> Class as shown below:

The dialog box shown below is displayed. You can name the class App (stands for Application). In the modifiers section, click the checkbox final to prevent other classes from subclassing the class App. Finally, you can click the checkbox "public static void main(String[] args)" in order to generate the main method. Click Finish to create the class App.
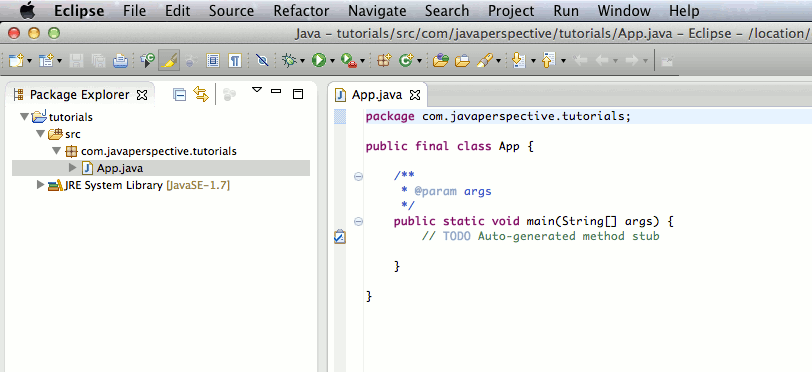
The following picture shows the content of the class App:
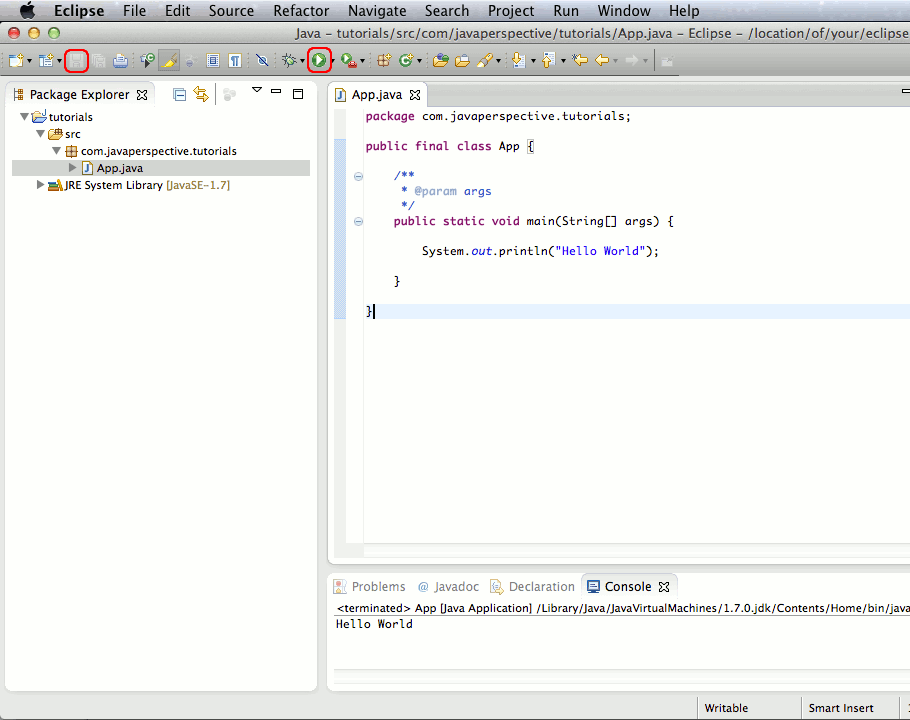
Modify the class App by adding a statement to the method main that prints Hello World to the standard output (as shown below) and click the button Save (outlined in red). When you save a source file in Eclipse, it is automatically compiled. The compilation errors and warnings, if any, are listed in the Problems tab at the bottom. After saving the class App, you can run it by clicking the button Run (also outlined in red). The main method prints Hello World to the standard output which can be viewed in the Console tab at the bottom:
Congratulations ! You have created your first Eclipse project. The next tutorial will show you several tips about Eclipse.
You are here :
JavaPerspective.com >
Intermediate Tutorials >
1. The Eclipse IDE >
1.2. First project with Eclipse
Next tutorial : JavaPerspective.com > Intermediate Tutorials > 1. The Eclipse IDE > 1.3. Tips about Eclipse
Next tutorial : JavaPerspective.com > Intermediate Tutorials > 1. The Eclipse IDE > 1.3. Tips about Eclipse