
5.25. Dialogs
Last updated: 1 January 2013.
This tutorial will show you how to use dialogs in Java.
A dialog is a frame belonging to a parent frame that pops up temporarily to display information or request input from the user. The JDK provides two classes to create dialogs: JOptionPane for simple standard dialogs and JDialog for more complex dialogs.
5.25.1. The class JOptionPane
The class JOptionPane provides static methods to display simple standard dialogs with a single line of code. There are 4 types of standard dialogs:
- Message dialogs: They are used to display information-messages to the user.
- Confirm dialogs: They are used to request confirmation from the user.
- Input dialogs: They are used to request input from the user.
- Option dialogs: They allow additional customization.
| Type | Code | Display |
|---|---|---|
| Message dialog | JOptionPane.showMessageDialog(parentFrame, "If you pay peanuts, you get monkeys"); | 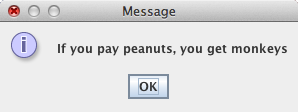 |
| Confirm dialog | int choice = JOptionPane.showConfirmDialog(parentFrame, "Do you want to save changes before closing?"); | 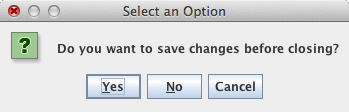 |
| Input dialog | String userInput = JOptionPane.showInputDialog(parentFrame, "Please enter your name"); | 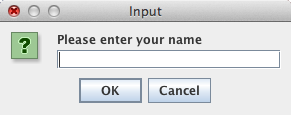 |
| Option dialog | int choice = JOptionPane.showOptionDialog(parentFrame, "Do you want to quit now?", "Quit the application", JOptionPane.YES_NO_OPTION, JOptionPane.QUESTION_MESSAGE, null, null, null); | 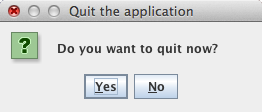 |
Message dialogs
In the code above, parentFrame is an instance of the class JFrame, although it could be any subclass of the class Component. Let's take a look at the first line of code that creates an information-message dialog:
JOptionPane.showMessageDialog(parentFrame, "If you pay peanuts, you get monkeys");
Only the parent frame and the information-message are specified. A default title (Message), button and icon are automatically provided. You can specify the title and the message type by calling the following method:
showMessageDialog(Component parentComponent, Object message, String title, int messageType).
The possible values for the integer argument messageType are INFORMATION_MESSAGE (the default value that is used implicitly by the method showMessageDialog(Component parentComponent, Object message) shown in the last code sample), ERROR_MESSAGE, WARNING_MESSAGE, QUESTION_MESSAGE and PLAIN_MESSAGE. The specified message type determines the default icon that is displayed. In the table shown below, I am calling the method showMessageDialog with each possible value for the argument messageType:
| Code | Display |
|---|---|
| JOptionPane.showMessageDialog(parentFrame, "If you pay peanuts, you get monkeys", "Information message", JOptionPane.INFORMATION_MESSAGE); | 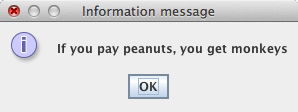 |
| JOptionPane.showMessageDialog(parentFrame, "If you pay peanuts, you get monkeys", "Error message", JOptionPane.ERROR_MESSAGE); | 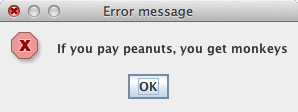 |
| JOptionPane.showMessageDialog(parentFrame, "If you pay peanuts, you get monkeys", "Warning message", JOptionPane.WARNING_MESSAGE); | 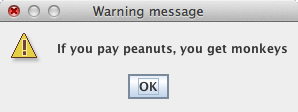 |
| JOptionPane.showMessageDialog(parentFrame, "If you pay peanuts, you get monkeys", "Question message", JOptionPane.QUESTION_MESSAGE); | 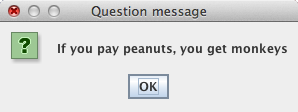 |
| JOptionPane.showMessageDialog(parentFrame, "If you pay peanuts, you get monkeys", "Plain message", JOptionPane.PLAIN_MESSAGE); | 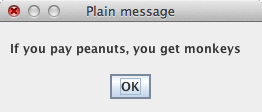 |
As you can see, depending on the message type, a specific default icon is provided. If you specify PLAIN_MESSAGE, no icon is provided. If none of the default icons meet your needs, you can specify a custom icon by calling the following method:
showMessageDialog(Component parentComponent, Object message, String title, int messageType, Icon icon)
In summary, the method showMessageDialog has 3 signatures:
- showMessageDialog(Component parentComponent, Object message)
- showMessageDialog(Component parentComponent, Object message, String title, int messageType)
- showMessageDialog(Component parentComponent, Object message, String title, int messageType, Icon icon)
Confirm dialogs
Confirm dialogs are used to request confirmation from the user. 4 methods are available:
- showConfirmDialog(Component parentComponent, Object message)
- showConfirmDialog(Component parentComponent, Object message, String title, int optionType)
- showConfirmDialog(Component parentComponent, Object message, String title, int optionType, int messageType)
- showConfirmDialog(Component parentComponent, Object message, String title, int optionType, int messageType, Icon icon)
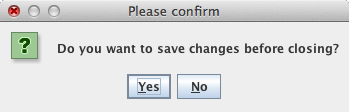
All the methods showConfirmDialog return an integer whose possible values are YES_OPTION, NO_OPTION, OK_OPTION, CANCEL_OPTION and CLOSED_OPTION. As an example, the following sample shows how to use the third method:
int choice = JOptionPane.showConfirmDialog(parentFrame, "Do you want to save changes before closing?", "Please confirm", JOptionPane.YES_NO_OPTION, JOptionPane.QUESTION_MESSAGE);
if(choice == JOptionPane.YES_OPTION){
// Save changes and close
}
else if(choice == JOptionPane.NO_OPTION){
// Close without saving
}
else if(choice == JOptionPane.CLOSED_OPTION){
// Do nothing (the user has closed the dialog without clicking a button)
}
if(choice == JOptionPane.YES_OPTION){
// Save changes and close
}
else if(choice == JOptionPane.NO_OPTION){
// Close without saving
}
else if(choice == JOptionPane.CLOSED_OPTION){
// Do nothing (the user has closed the dialog without clicking a button)
}
Here is the dialog:
Input dialogs
They are used to request input from the user. To create an input dialog, you can use one of the following methods:
- showInputDialog(Component parentComponent, Object message)
- showInputDialog(Component parentComponent, Object message, Object initialSelectionValue)
- showInputDialog(Component parentComponent, Object message, String title, int messageType)
- showInputDialog(Component parentComponent, Object message, String title, int messageType, Icon icon, Object[] selectionValues, Object initialSelectionValue)
- showInputDialog(Object message)
- showInputDialog(Object message, Object initialSelectionValue)
String[] genders = {"Male", "Female"};
String userInput = (String) JOptionPane.showInputDialog(parentFrame, "Please select a gender", "Gender selection", JOptionPane.PLAIN_MESSAGE, null, genders, genders[0]);
if(userInput == null){
// The user has clicked the Cancel button or has closed the dialog without clicking a button
}
else if(userInput.equals(genders[0])){
// Male selected
}
else if(userInput.equals(genders[1])){
// Female selected
}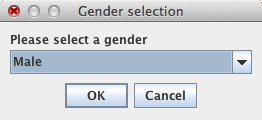
Here is the input dialog:
Option dialogs
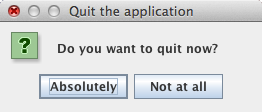
Option dialogs have additional customization features. In particular, you can use custom text for the buttons. For example, here is a sample that creates an option dialog with custom text for the buttons:
String[] options = {"Absolutely", "Not at all"};
int choice = JOptionPane.showOptionDialog(parentFrame, "Do you want to quit now?", "Quit the application", JOptionPane.YES_NO_OPTION, JOptionPane.QUESTION_MESSAGE, null, options, options[0]);
if(choice == JOptionPane.YES_OPTION){
// Quit
}
else if(choice == JOptionPane.NO_OPTION){
// Don't quit
}
else if(choice == JOptionPane.CLOSED_OPTION){
// Do nothing (the user has closed the dialog without clicking a button)
}
Here is the option dialog:
Dialogs in internal frames
If you want a dialog to be created as an internal frame, use the methods whose names start with showInternal...: showInternalConfirmDialog, showInternalInputDialog, showInternalMessageDialog or showInternalOptionDialog. These methods are used in the same manner as their non-internal counterparts.
5.25.2. The class JDialog
The class JDialog is meant to create custom dialogs. If none of the dialogs provided by the class JOptionPane fits the need, you can use the class JDialog. A dialog created with the class JDialog can be modal or not. If a dialog is modal, it blocks the access to the other frames of the application. The modality of a dialog can be specified in several constructors of the class JDialog, such as JDialog(Frame owner, String title, boolean modal). Note that all the dialogs created with the class JOptionPane are modal.
Since the class JDialog inherits the class Window, you can place any kinds of components in a JDialog instance. Here is a custom dialog created with the class JDialog:
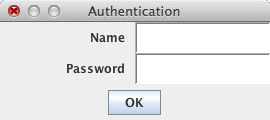
Here is the code that builds the dialog shown above:
import java.awt.BorderLayout;
import java.awt.GridLayout;
import java.awt.event.ActionEvent;
import java.awt.event.ActionListener;
import javax.swing.BorderFactory;
import javax.swing.JButton;
import javax.swing.JDialog;
import javax.swing.JFrame;
import javax.swing.JLabel;
import javax.swing.JPanel;
import javax.swing.JPasswordField;
import javax.swing.JTextField;
import javax.swing.SwingConstants;
import javax.swing.border.BevelBorder;
public final class CustomDialog extends JDialog implements ActionListener {
private JTextField userNameTextField;
private JPasswordField userPasswordField;
private JButton okButton;
public CustomDialog(JFrame owner, String title, boolean modal) {
super(owner, title, modal);
addComponents();
setSize(270, 120);
setLocationRelativeTo(owner);
setResizable(false);
setVisible(true);
}
public void actionPerformed(ActionEvent e){
if(authenticationOk(userNameTextField.getText(), userPasswordField.getPassword())){
// Close the dialog
setVisible(false);
// ...
// ...
}
}
private void addComponents() {
// Set the layout to BorderLayout
setLayout(new BorderLayout());
// Create the center panel
JPanel centerPanel = new JPanel(new GridLayout(0, 2));
// Set up the user name label
JLabel userNameLabel = new JLabel("Name", SwingConstants.TRAILING);
userNameLabel.setBorder(BorderFactory.createEmptyBorder(0, 0, 0, 10));
centerPanel.add(userNameLabel);
// Set up the user name text field
userNameTextField = new JTextField(15);
userNameTextField.setBorder(BorderFactory.createBevelBorder(BevelBorder.LOWERED));
centerPanel.add(userNameTextField);
// Set up the user password label
JLabel userPasswordLabel = new JLabel("Password", SwingConstants.TRAILING);
userPasswordLabel.setBorder(BorderFactory.createEmptyBorder(0, 0, 0, 10));
centerPanel.add(userPasswordLabel);
// Set up the user password text field
userPasswordField = new JPasswordField(15);
userPasswordField.setBorder(BorderFactory.createBevelBorder(BevelBorder.LOWERED));
centerPanel.add(userPasswordField);
// Add centerPanel to the center
add(centerPanel);
// Create the south panel
JPanel southPanel = new JPanel();
// Set up the ok button
okButton = new JButton("OK");
okButton.addActionListener(this);
southPanel.add(okButton);
// Add southPanel to the bottom
add(southPanel, BorderLayout.PAGE_END);
}
private boolean authenticationOk(String userName, char[] userPassword){
// Check the user name and password
//...
return true;
}
}
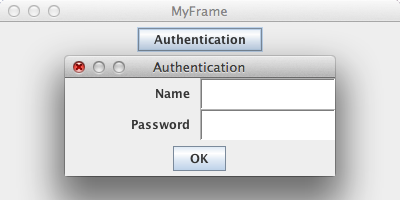
Next, I have built a frame containing a single button. When the user clicks the button, the custom dialog pops up. The code follows:
import java.awt.event.ActionEvent;
import java.awt.event.ActionListener;
import javax.swing.JButton;
import javax.swing.JFrame;
import javax.swing.JPanel;
import javax.swing.SwingUtilities;
public final class MyFrame extends JFrame implements ActionListener {
public MyFrame() {
init();
addComponents();
setDefaultCloseOperation(JFrame.EXIT_ON_CLOSE);
setVisible(true);
}
public void actionPerformed(ActionEvent e){
new CustomDialog(this, "Authentication", true);
}
private void addComponents() {
// Create the content pane
JPanel contentPane = new JPanel();
// Set up the authentication button
JButton authenticationButton = new JButton("Authentication");
authenticationButton.addActionListener(this);
contentPane.add(authenticationButton);
// Add the content pane to the JFrame
add(contentPane);
}
private void init() {
setTitle("MyFrame");
setSize(400, 200);
setLocationRelativeTo(null);
}
public static void main(String[] args){
SwingUtilities.invokeLater(new Runnable() {
public void run() {
new MyFrame();
}
});
}
}
Here is the frame with the dialog over it:
You are here :
JavaPerspective.com >
Intermediate Tutorials >
5. Graphical User Interfaces >
5.25. Dialogs
Next tutorial : JavaPerspective.com > Intermediate Tutorials > 5. Graphical User Interfaces > 5.26. File choosers
Next tutorial : JavaPerspective.com > Intermediate Tutorials > 5. Graphical User Interfaces > 5.26. File choosers